Watering seedlings correctly can make the difference between healthy plants and failed starts. Many gardeners struggle with keeping their young plants properly hydrated without drowning them or leaving dry spots in the soil. Bottom watering seedlings involves adding water to a tray beneath seed containers, allowing the growing medium to soak up moisture from below through drainage holes, which promotes even hydration and stronger root development. This method prevents common problems like disturbed soil, washed-away seeds, and weak shallow roots.
The technique works especially well for delicate seedlings that can't handle water poured directly on their stems and leaves. Bottom watering also reduces the risk of fungal diseases that thrive in wet surface conditions. Gardeners who master this approach report stronger plants with deeper root systems that transplant better into the garden.
Getting started with bottom watering requires just a few simple supplies and an understanding of timing. The process takes less than an hour of active work, though plants need about 30 minutes to soak up the water they need. Once gardeners learn the basic steps and signs to watch for, bottom watering becomes a reliable routine that produces consistent results.
Key Takeaways
- Bottom watering provides moisture through drainage holes from below, creating even hydration and stronger roots than top watering
- The process requires seed trays with drainage holes, a separate water-holding tray, and fine-particle growing medium that wicks moisture effectively
- Seedlings should soak for about 30 minutes before draining excess water, with frequency determined by touch and weight tests of the growing medium
What Is Bottom Watering?
Bottom watering is a method where plants absorb water from below rather than receiving it from above. This approach uses natural water movement through soil to hydrate seedlings more evenly and safely.
Definition and Purpose
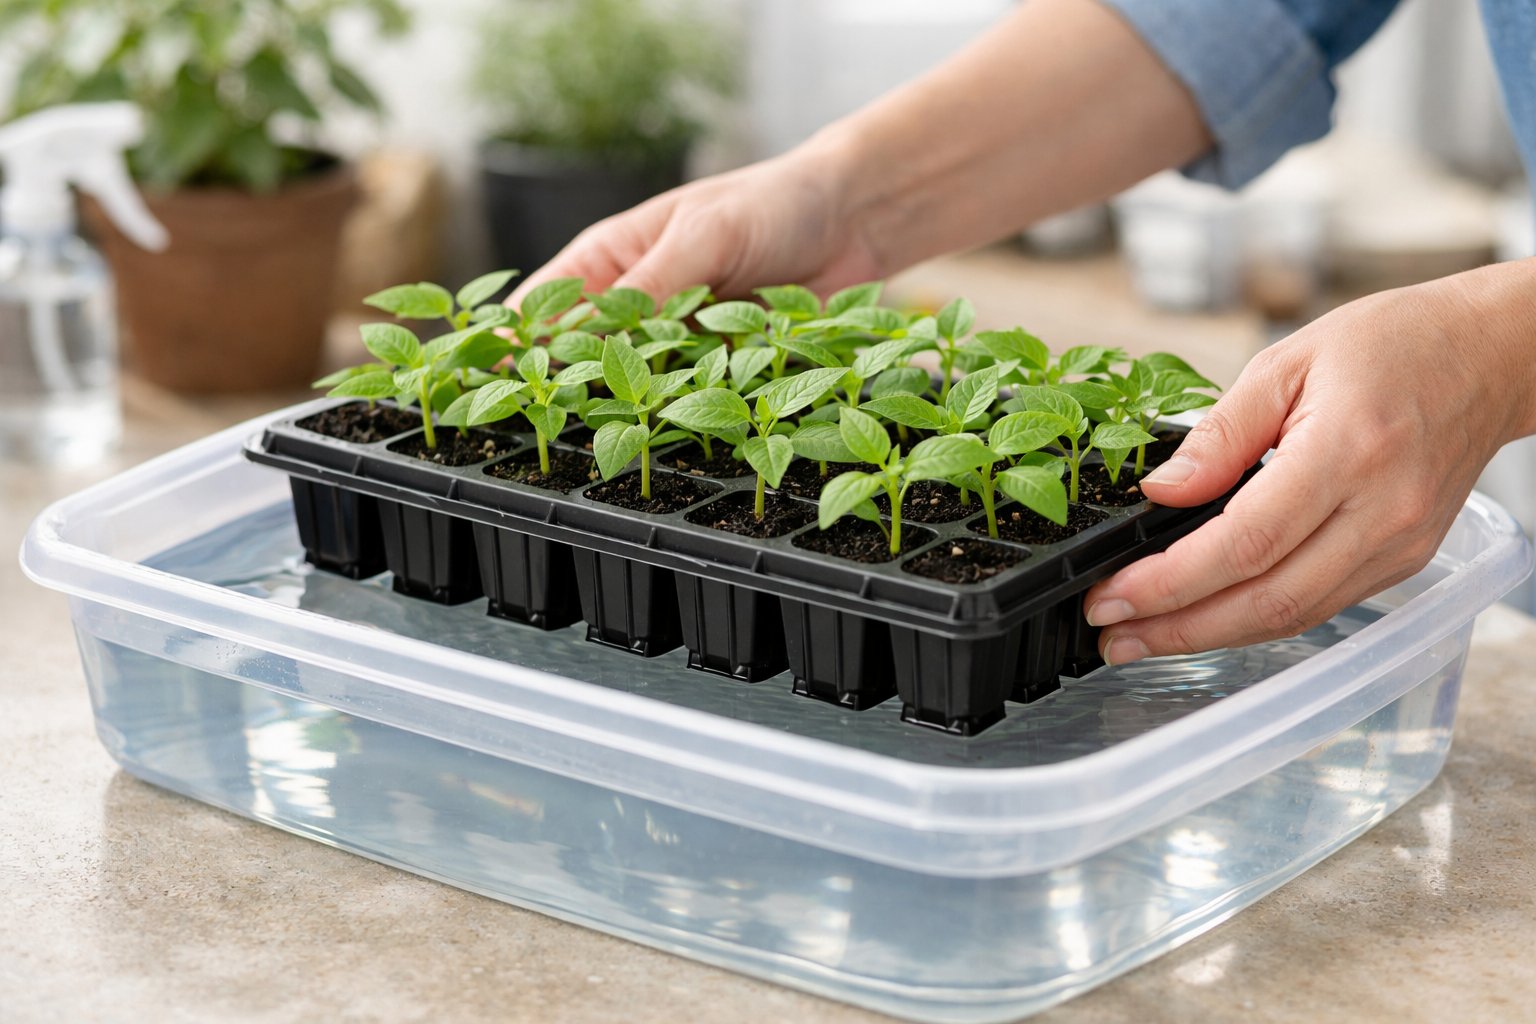
Bottom watering seedlings means placing seed trays in a shallow pool of water and letting the growing medium absorb moisture from below. The process involves filling a tray without drainage holes with water, then setting cell trays with drainage holes into that water. Gardeners typically use less than an inch of water for most setups.
The primary purpose is to protect fragile seedlings while ensuring thorough soil hydration. When watering seedlings from the bottom, the delicate stems and leaves stay dry, which reduces the risk of fungal diseases. The method also prevents seeds from washing away or shifting position. Root systems develop more strength because they grow downward toward the water source instead of staying near the surface.
How Capillary Action Works
Capillary action is the physical force that pulls water upward through small spaces in soil. Water molecules stick to soil particles and to each other, creating an upward movement against gravity. Fine-particle seed starting mixes made from peat moss or coconut coir work best because their small particle size creates tiny channels for water to travel through.
The process moves water from the bottom tray up through drainage holes in the cell trays. The growing medium wicks moisture throughout its depth within about 30 minutes. Room temperature water works better than cold water because it moves through soil more easily. The soil absorbs exactly what it needs without becoming waterlogged when excess water drains back into the bottom tray after removal.
Key Differences Between Bottom Watering and Top Watering
Bottom watering vs top watering involves distinct approaches to moisture delivery:
- Water contact: Bottom watering keeps foliage and stems dry, while top watering wets the entire plant
- Root development: Bottom watering encourages downward root growth; top watering can lead to shallow roots near the surface
- Disease risk: Bottom watering reduces fungal problems like damping off by keeping stems dry
- Soil disturbance: Bottom watering leaves soil undisturbed; top watering can displace seeds or compact growing medium
- Watering precision: Bottom watering lets soil absorb what it needs through capillary action; top watering requires careful measurement to avoid overwatering
Top watering works well for surface moisture maintenance between bottom watering sessions. Many gardeners combine both methods, using top watering to keep the surface damp during germination and bottom watering to hydrate the full root zone.
Benefits of Bottom Watering Seedlings
Bottom watering provides several advantages that help seedlings grow stronger and healthier. This method addresses common growing problems while making water use more efficient.
Preventing Overwatering and Root Rot
Bottom watering helps prevent overwatering by allowing plants to absorb only the water they need. When seedlings sit in a water tray, their roots draw moisture upward through the soil until the growing medium reaches the right saturation level. The gardener removes the tray after 10-15 minutes, which stops water intake naturally.
This approach reduces the risk of root rot significantly. Root rot occurs when roots sit in waterlogged soil for extended periods, creating conditions where harmful fungi like Pythium and Phytophthora thrive. These pathogens attack saturated root systems and cause irreversible damage.
The top layer of soil stays drier with bottom watering. This creates a less favorable environment for fungal growth while the roots below receive adequate moisture. Growers can check if plants have absorbed enough water by lifting the container to feel its weight or by touching the soil surface to confirm moisture has reached the top inch of the growing medium.
Encouraging Deep Root Development
Bottom watering promotes downward root growth as seedlings reach toward the water source below. This natural response creates stronger root systems that anchor plants more securely and support healthier growth above ground.
Roots that grow deep can access nutrients and moisture more effectively than shallow root systems. When water is applied from below, roots develop throughout the entire soil depth rather than concentrating near the surface. This extensive root network makes seedlings more resilient to environmental stress.
The method also prevents the formation of weak, surface-level roots that develop when plants receive only top watering. Deep roots help seedlings transition more successfully to outdoor conditions or larger containers. Plants with established root systems handle transplant shock better and establish themselves faster in their new growing location.
Reducing Fungal Issues and Fungus Gnats
The dry soil surface created by bottom watering discourages fungus gnats from laying eggs. These pests require moist growing medium to complete their life cycle, and they typically deposit eggs in the top layer of soil. When this area stays dry, it disrupts their breeding pattern.
Fungal diseases that affect seedling leaves also become less common with this watering method. Water applied from above can splash soil onto leaves, which spreads fungal spores and creates damp conditions on foliage. Bottom watering keeps leaves dry and reduces the spread of damaging fungi.
The method minimizes mold and musty odors that develop in constantly wet soil. A drier surface layer allows better air circulation around the base of seedlings, which further prevents fungal problems and keeps the growing environment healthier.
Consistent Moisture and Efficient Water Use
Bottom watering delivers moisture evenly throughout the soil without creating dry pockets or oversaturated zones. The capillary action pulls water upward at a steady rate, ensuring uniform distribution. This consistent moisture level helps seedlings grow at a more predictable pace.
The method reduces water waste by eliminating runoff. Top watering often results in excess water flowing through drainage holes before soil can absorb it, but bottom watering allows roots time to draw up moisture gradually. Less water is needed overall to achieve proper hydration.
Evaporation loss decreases significantly compared to top watering methods. Water applied to the soil surface evaporates quickly, especially in warm or dry conditions. Bottom watering protects moisture below the surface where roots can access it before it escapes into the air.
Essential Equipment and Growing Mediums
Bottom watering seedlings requires specific equipment and growing materials to work effectively. The right combination of trays, drainage systems, and moisture-retentive mediums ensures seedlings receive consistent hydration without oversaturation.
Selecting Seed Trays and Bottom Trays
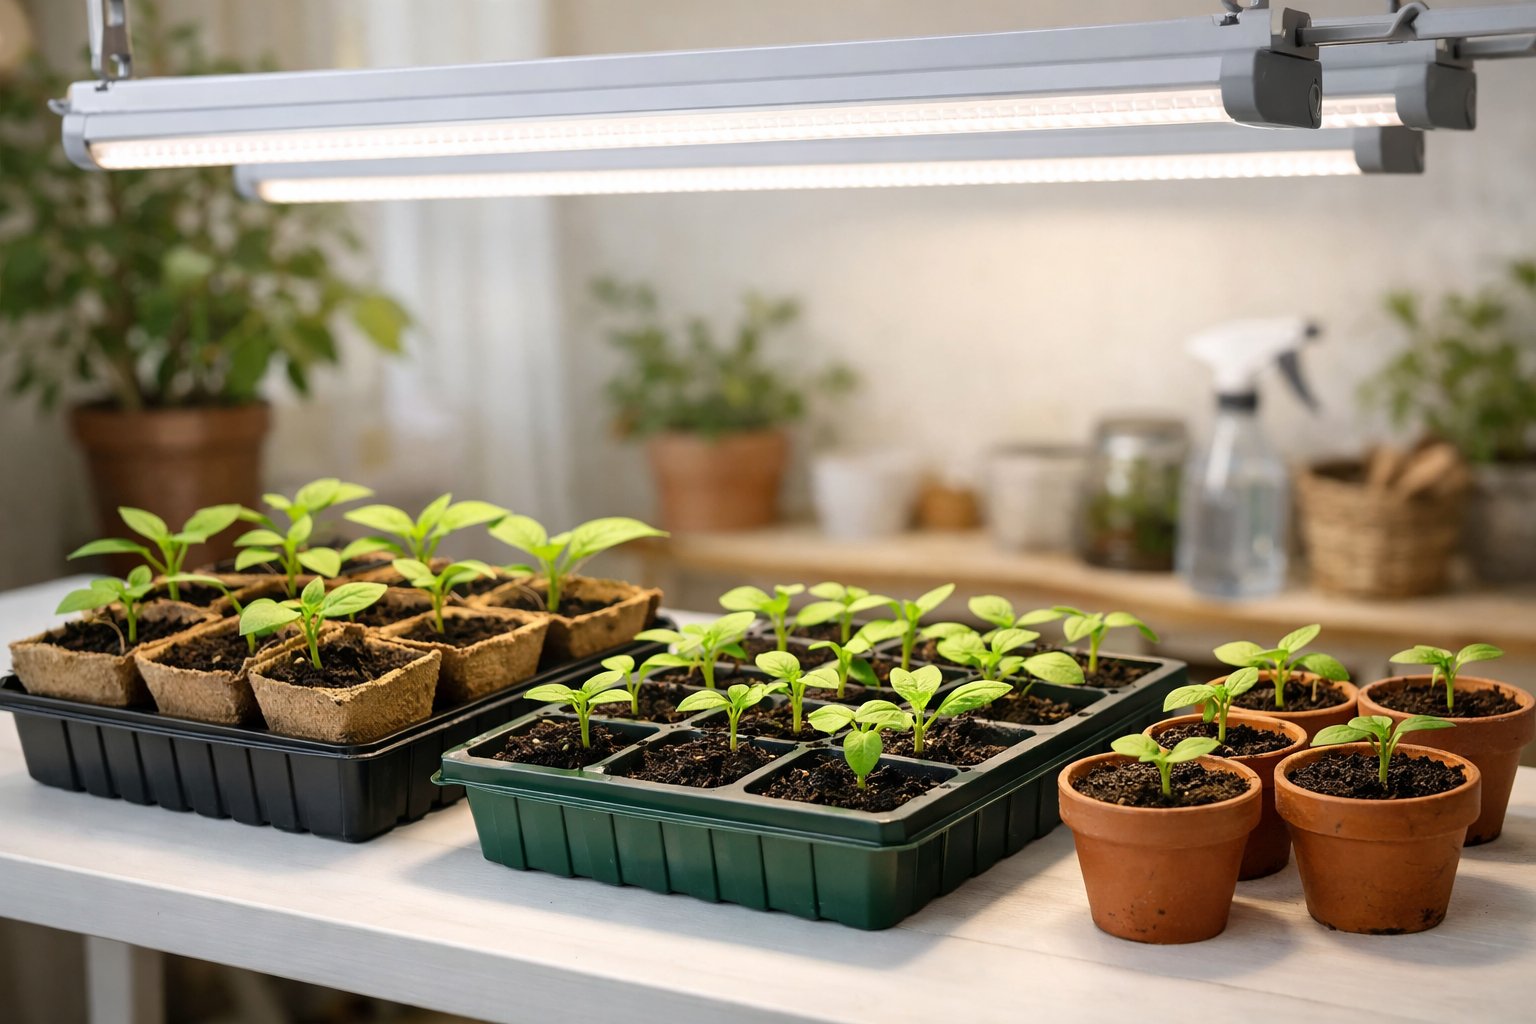
Cell trays with multiple entry points along the sides and base work best for bottom watering. These openings allow water to enter the growing medium from below, which the soil can then wick upward to the roots. Standard 6-cell trays or 4-cell trays both function well for this purpose.
The bottom tray must be watertight without any drainage holes. This tray sits underneath the cell trays and holds the water that seedlings will absorb from below. A seedling tray that's too shallow won't hold enough water for proper absorption, while one that's too deep may encourage gardeners to add excessive water.
The size of the bottom watering tray should accommodate all the cell trays being used. Universal bottom trays work for multiple seed tray configurations. Some gardeners use germination domes with their trays to reduce water evaporation during the initial germination period.
Importance of Drainage Holes
Drainage holes in seed trays serve a critical function during bottom watering. They allow water to enter from below and let excess moisture drain back out once the growing medium has absorbed what it needs. Without these holes, water can't reach the roots from underneath.
Multiple drainage holes work better than just one or two. The more entry points available, the more evenly water distributes through the growing medium. This prevents dry spots and ensures all roots have access to moisture.
After the half-hour soaking period, drainage holes allow oversaturated soil to release excess water back into the bottom tray. This self-regulating system helps prevent waterlogged conditions that lead to fungal problems like damping off.
Choosing Appropriate Seed Starting Mix
Seed starting mix differs from regular potting soil or potting mix. It uses fine particles rather than large chunks of wood, rocks, or debris. This fine texture reduces air pockets and keeps moisture in constant contact with seeds.
Most seed starting mixes contain peat moss or coconut coir as the base ingredient. These materials wick water upward effectively, which makes them ideal for bottom watering. The mix should feel light and fluffy when dry but hold moisture well when wet.
Avoid using garden soil or heavy potting mix for seed starting. These materials don't wick water as efficiently and may contain pathogens harmful to young seedlings. A small amount of worm castings can be added since they hold up to 10 times their weight in water.
Role of Perlite, Vermiculite, and Coco Coir
Coco coir serves as an excellent base for seed starting mix because it holds moisture while remaining lightweight. It wicks water upward better than many alternatives and doesn't become as hydrophobic as peat moss when it dries out completely. Coco coir also provides better aeration than peat-based mixes.
Perlite adds drainage and prevents compaction in seed starting mix. The white volcanic glass particles create air spaces that allow roots to penetrate easily while preventing the mix from becoming muddy or clay-like. Too much perlite can reduce water retention, so it should make up only 10-20% of the total mix.
Vermiculite retains water and nutrients better than perlite. It expands when wet and helps distribute moisture evenly throughout the growing medium. Vermiculite works especially well in bottom watering systems because it pulls water up from below and holds it near the roots.
A balanced seed starting mix might contain 50% coco coir, 30% peat moss, 10% perlite, and 10% vermiculite. This combination provides good water retention, adequate drainage, and easy root penetration for developing seedlings.
Step-by-Step Guide: How to Bottom Water Seedlings
Bottom watering seedlings requires the right setup and timing to work effectively. The process involves placing seed trays in shallow water so the growing medium can absorb moisture from below, which takes about 30 minutes before excess water needs removal.
Preparing Trays and Setting Up
The bottom watering method requires two types of trays. The first is a cell tray with drainage holes along the bottom and sides. The second is a solid bottom tray without any holes that can hold water underneath the cell tray.
Before starting, gardeners should fill their cell trays with a fine-textured seed starting mix. Peat moss or coconut coir work well because these materials wick moisture upward efficiently. The growing medium should already be pre-moistened before planting seeds.
The cell trays need multiple entry points for water to enter from below. Standard 6-cell trays or 4-cell trays work well for this watering technique. The solid undertray must be large enough to hold all the cell trays being watered at once.
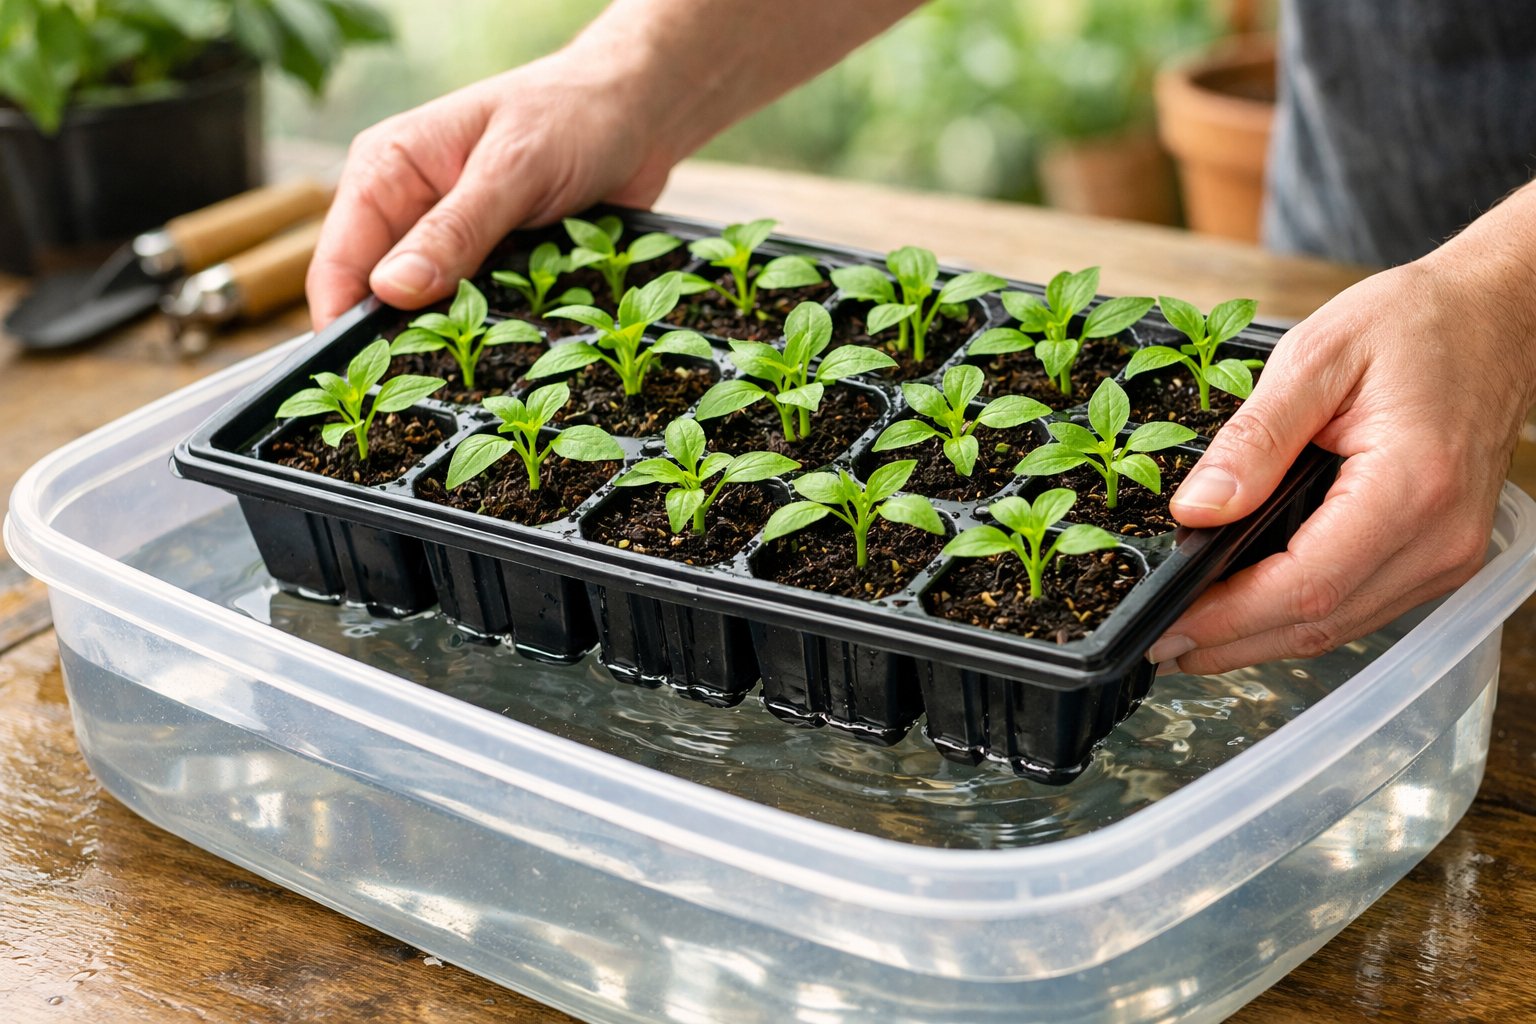
Hydrating and Placing the Seedling Tray
Room temperature water works best for bottom watering seedlings. Hot water can damage seeds and roots, while cold water may shock young plants. Pour less than one inch of water into the solid bottom tray.
Place the cell tray directly into the water-filled undertray. The water level should reach partway up the sides of the cells but not overflow onto the soil surface. For trays with multiple cells, up to one inch of water may be needed to ensure even absorption across all cells.
The growing medium will begin wicking moisture upward immediately through capillary action. This watering technique ensures water reaches the root zone without disturbing seeds or fragile seedlings. The soil surface should remain relatively dry during this process.
Timing and Monitoring Water Absorption
Seedling trays should sit in water for approximately 30 minutes. This gives the growing medium enough time to absorb adequate moisture without becoming waterlogged. Longer soaking times increase the risk of fungal problems like damping off.
Gardeners can check absorption by touching the soil surface. When the top feels slightly damp, the medium has wicked up enough water. Another method involves lifting the tray to check its weight. A properly watered tray feels noticeably heavier than a dry one.
Different tray depths may require timing adjustments. Deeper 4-inch trays might need closer to 30 minutes, while shallow trays could finish absorbing in 20 minutes.
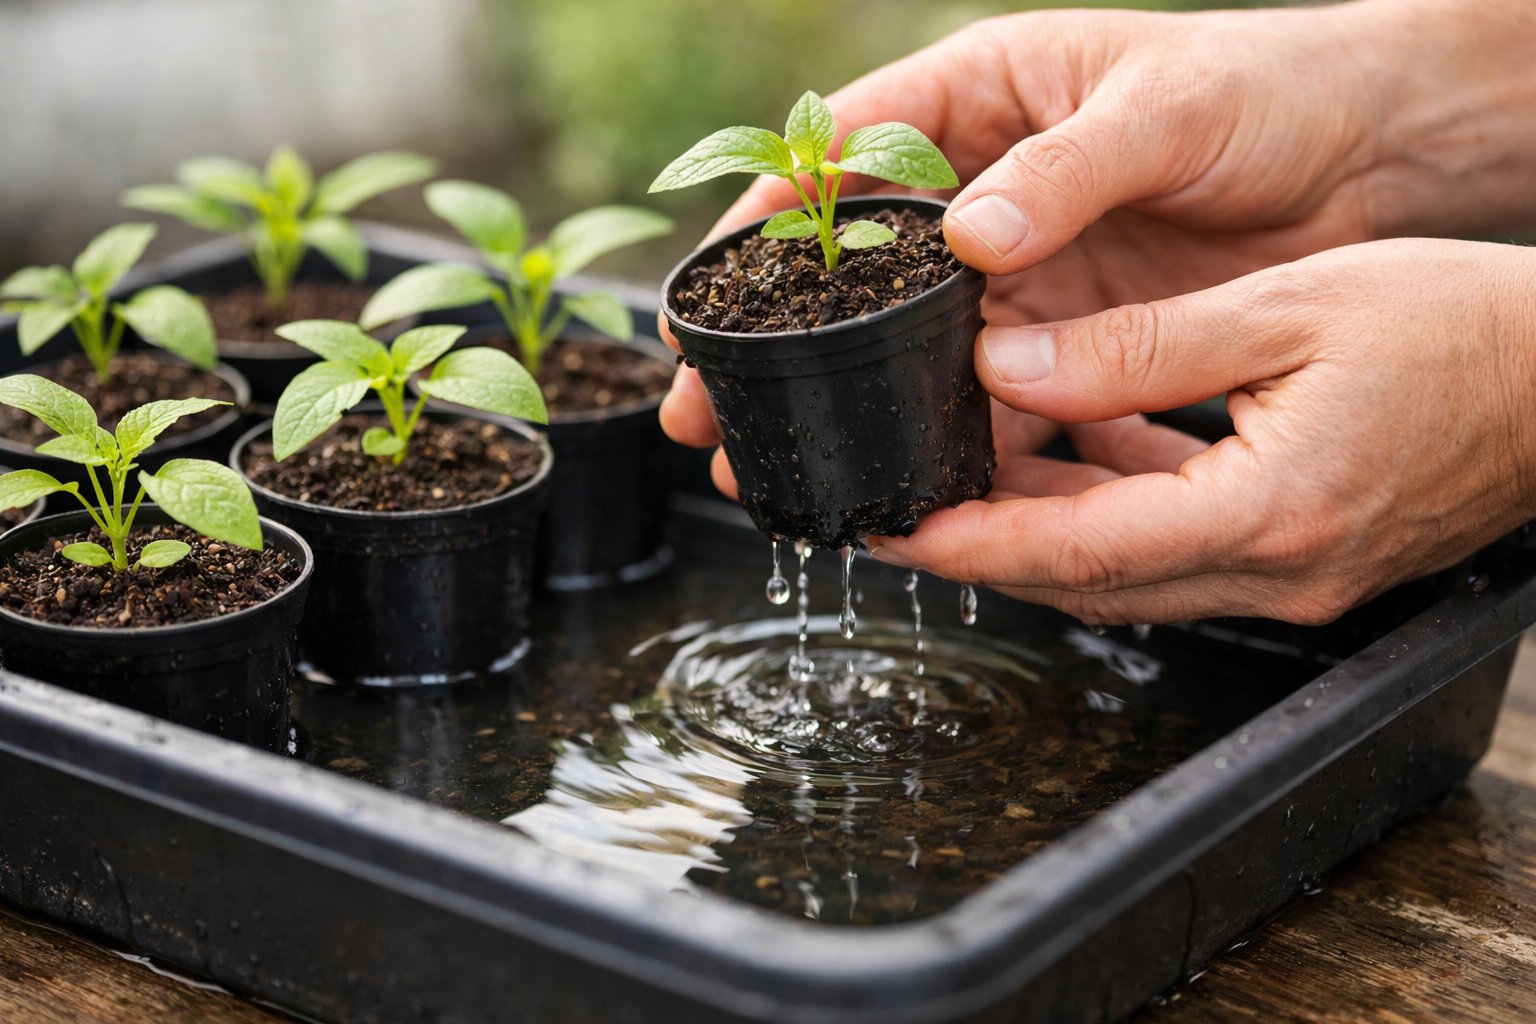
Final Steps and Removing Excess Water
After the soaking period ends, lift the cell tray out of the water. Pour out all remaining water from the solid bottom tray. This step prevents seedlings from sitting in standing water for extended periods.
Let the cell tray drain freely for a few minutes. Any excess water will drip out through the drainage holes. The growing medium should feel moist throughout but not soggy or muddy.
Never leave seedling trays sitting in water continuously. This creates conditions where fungal pathogens thrive and can kill young plants. The bottom tray should stay empty between waterings. Gardeners repeat this watering process whenever the soil surface feels dry to the touch or the tray feels light when lifted.
Determining Water Quality and Best Practices
The type and temperature of water used for bottom watering directly affects seedling health and germination rates. Poor water quality can introduce harmful chemicals or pathogens that damage young plants.
Choosing the Best Water for Seedlings
Rainwater ranks as the best water for seedlings because it contains no chlorine, fluoride, or dissolved minerals that can build up in growing medium. Gardeners can collect rainwater in clean containers for use throughout the growing season.
Tap water works well for most seedlings if left to sit uncovered for 24 hours. This waiting period allows chlorine to evaporate naturally. However, chloramine (a chlorine alternative used in some municipal systems) does not evaporate and may require a water filter to remove.
Well water often contains high levels of minerals like calcium and magnesium. These minerals can accumulate in seed starting mix over time. A water test reveals the exact mineral content and pH level.
Distilled or filtered water provides another reliable option for watering plants. These waters lack minerals entirely, which prevents buildup. However, they also lack beneficial minerals that can support growth. Many gardeners use a mix of filtered and tap water to balance these concerns.
Water Temperature and Cleanliness
Room temperature water between 65°F and 75°F (18°C to 24°C) works best for bottom watering established seedlings. Cold water shocks roots and slows nutrient uptake. Hot water damages delicate root systems and can kill beneficial microorganisms in the growing medium.
The bottom watering tray must remain clean between uses. Dirty trays harbor fungal spores and bacteria that cause damping off disease. Wash trays with soap and water after each use, then sanitize them with a diluted bleach solution (1 part bleach to 9 parts water).
Water that sits in trays for more than 30 minutes becomes stagnant. Stagnant water creates an environment where harmful pathogens multiply rapidly. Always pour out excess water after the growing medium absorbs what it needs.
Establishing a Watering Schedule and Frequency
Bottom watering seedlings requires attention to timing and environmental conditions rather than following a rigid calendar. Most seedlings need bottom watering once or twice per week, but the actual frequency depends on factors like temperature, humidity, and plant maturity.
How Often to Bottom Water Seedlings
Seedlings typically need bottom watering every 2-4 days during the germination phase. The grower should add less than an inch of water to the bottom tray and allow the cell trays to sit for about 30 minutes before draining excess water.
After germination, watering frequency increases. Once seedlings reach 1-3 inches in height, they may need water every 1-2 days. More mature seedlings around 3 inches tall often require watering twice daily because they consume water faster.
The grower should never leave seedlings sitting in standing water for extended periods. This creates conditions for fungal problems like damping off. Each watering session should last only 30 minutes before the excess water gets poured out.
Signs Your Seedlings Need Water
The touch test provides the fastest way to check moisture levels. When the soil surface feels dry to the touch, the seedlings need water. Dry soil appears lighter in color compared to moist soil.
The weight test offers more accuracy. A properly hydrated tray feels noticeably heavier than a dry one. The grower can compare a dry tray with a freshly watered tray to learn the difference.
Wilting leaves indicate severe water stress. However, waiting for wilting means the seedlings already suffered damage. Regular monitoring prevents this problem.
Environmental Factors Impacting Frequency
Temperature directly affects how quickly soil dries out. Seedlings in warm environments above 70°F need more frequent watering than those in cooler 60°F conditions. Heat mats increase water consumption.
Humidity levels change evaporation rates. Low humidity causes faster drying, while high humidity keeps soil moist longer. Germination domes reduce water loss but get removed once seedlings reach one inch tall.
Light exposure impacts watering needs. Seedlings under grow lights or in bright sunny spots dry out faster than those in lower light. The grower must adjust watering frequency based on these conditions rather than sticking to a fixed schedule.
Monitoring Seedling Health and Adjusting Techniques
Checking seedlings regularly helps catch problems early and allows growers to adjust their bottom watering approach. A moisture meter provides accurate readings of soil wetness, while visual checks of leaves and roots reveal how plants respond to their watering schedule.
Using a Moisture Meter to Avoid Overwatering
A moisture meter takes the guesswork out of bottom watering by measuring soil wetness at root level. These devices insert into the potting mix and provide readings that show whether the soil is dry, moist, or wet.
Most moisture meters use a scale from 1 to 10, where 1-3 indicates dry soil, 4-7 shows adequate moisture, and 8-10 means the soil is too wet. For seedlings, the ideal reading falls between 5 and 7 before bottom watering begins.
To use a moisture meter correctly, insert the probe into the soil at least 2 inches deep, roughly halfway down the container. Wait 60 seconds for an accurate reading. Check multiple spots in the tray since moisture levels can vary.
Seedlings need bottom watering when the meter reads between 2 and 4. This prevents both underwatering and the overwatering that leads to root rot. Digital meters with batteries tend to give more reliable readings than analog versions, though both work well for monitoring seedling trays.
Monitoring Seedling Response and Root Health
Healthy seedlings show specific signs that indicate proper bottom watering. Leaves should appear firm and green, standing upright without drooping or yellowing. Stems need to be sturdy and able to support the weight of new growth without bending.
Root health tells the most important story. Gently remove a seedling from its container every few days to inspect the roots. Healthy roots appear white or light tan and feel firm to the touch. They should spread throughout the potting mix rather than clustering at the bottom.
Warning signs include yellowing lower leaves, which often indicate overwatering. Wilting despite moist soil suggests root damage. Brown or black roots with a mushy texture point to root rot from excessive moisture.
Stunted growth or pale leaves may mean the seedling needs more frequent bottom watering sessions. The top inch of soil should dry out between waterings, but the root zone needs to stay consistently moist.
Preventing Damping Off and Other Problems
Damping off is a fungal disease that causes seedling stems to rot at soil level, making young plants collapse and die. This problem thrives in overly wet conditions, especially when bottom watering too frequently or leaving seedlings in standing water too long.
To prevent damping off, limit bottom watering sessions to 10-15 minutes maximum. Remove trays from water as soon as the soil surface looks moist. Never let containers sit in water for hours.
Good air circulation reduces fungal growth significantly. Place a small fan near seedling trays on low speed, or ensure proper spacing between containers. Warm temperatures between 65°F and 75°F help, as damping off spreads faster in cool, damp conditions.
Sterilized potting mix and clean containers prevent disease from starting. Avoid reusing soil from previous plantings. If damping off appears, remove affected seedlings immediately and reduce watering frequency for the remaining plants.
Advanced Tips for Successful Bottom Watering
Bottom watering becomes even more effective when gardeners add nutrients at the right time, maintain proper humidity levels, and ensure good drainage. These techniques help seedlings grow stronger roots and avoid common problems.
Applying Fertilizer When Bottom Watering
Water-soluble fertilizer works best with bottom watering because it dissolves completely and spreads evenly through the soil. The gardener should mix the fertilizer in water according to package directions before pouring it into the bottom watering tray.
This method lets the entire root system access nutrients as the water moves up through the soil. The roots absorb fertilizer more efficiently than with top watering.
Most seedlings need their first feeding 2-3 weeks after germination. Use a diluted fertilizer at quarter or half strength to avoid burning delicate roots.
The timing stays the same as regular bottom watering. Leave the seedling tray in the fertilizer water for 15-20 minutes until the soil surface feels damp.
Using a Humidity Dome Effectively
A humidity dome keeps moisture around seedlings longer and speeds up germination. The dome traps water vapor and maintains consistent conditions without daily watering.
Gardeners can bottom water at any time of day when using a humidity dome. The protected environment prevents rapid moisture loss from heat or dry air.
Remove the dome once seedlings develop their first true leaves. This prevents fungal growth from excess humidity around mature seedlings.
Vent the dome daily by propping it open for 15-30 minutes. This allows fresh air circulation while maintaining moisture levels.
Check soil moisture by touching it through the dome vents. The soil should feel like a damp sponge, not soaking wet or completely dry.
Improving Drainage and Airflow
Good drainage prevents water from sitting too long around roots. The seedling tray must have drainage holes at the bottom for excess water to escape.
After bottom watering, always return the seedling tray to an empty container for 10 minutes. This draining period removes water the soil couldn't absorb.
Space seedling containers apart on the tray to allow air movement between plants. Crowded seedlings create humid pockets where fungus and pests thrive.
Use a small fan on low setting to improve air circulation in the growing area. Point it away from seedlings so it doesn't blow directly on them or dry them out too fast.
The growing medium should contain perlite or vermiculite to improve drainage. These materials create air pockets in the soil that prevent waterlogging while holding enough moisture for roots.
Frequently Asked Questions
Bottom watering seedlings raises common questions about timing, technique, and effectiveness. Understanding proper duration, water volume, and monitoring methods helps gardeners avoid mistakes and grow healthy plants.
What is the correct duration for bottom watering various types of seedlings?
Most seedlings need to sit in water for about 30 minutes during bottom watering. This timeframe allows the growing medium to wick up moisture without becoming oversaturated.
After 30 minutes, gardeners should pour out any remaining water from the bottom tray. Leaving seedlings in standing water for longer periods increases the risk of fungal diseases like damping off.
Some larger or deeper cell trays may need slightly longer. However, exceeding one hour of soaking time is rarely necessary for any seedling type.
Is it possible to overwater seedlings when using the bottom watering method?
Yes, overwatering can occur with bottom watering if seedlings sit in water too long. Constant exposure to standing water creates soggy conditions that promote root rot and fungal pathogens.
The key to preventing overwatering is limiting soaking time to 30 minutes. After this period, the excess water must be drained from the bottom tray completely.
Using less than one inch of water in the bottom tray also helps prevent oversaturation. The growing medium should feel damp but not waterlogged when properly watered.
What steps should I take to successfully bottom water indoor seedlings?
First, place seed cell trays into a solid bottom tray without drainage holes. Add room temperature water to the bottom tray until it reaches less than one inch deep.
Let the trays sit for 30 minutes so the growing medium can absorb moisture through the drainage holes. The water will wick upward through the fine particles of the seed starting mix.
After 30 minutes, pour out any water remaining in the bottom tray. This prevents the seedlings from sitting in excess moisture that could cause problems.
Check the trays daily by touching the soil surface and lifting them to test their weight. These two methods help determine when the next watering is needed.
How can I tell if my seedlings have received enough water through bottom watering?
The weight test provides the most reliable indication of proper watering. A properly hydrated tray feels noticeably heavier than a dry tray when lifted.
Gardeners can compare a dry tray filled with seed starting mix to a fully hydrated one. This comparison helps establish what a well-watered tray should feel like.
The surface should also feel damp to the touch. If the top of the growing medium feels dry, the seedlings likely need more water or more frequent watering sessions.
Moisture should be distributed evenly throughout the cell. Sticking a finger slightly below the surface can reveal whether water has wicked up properly from the bottom.
What are the benefits of bottom watering seedlings compared to top watering?
Bottom watering prevents water from disturbing seeds or washing them out of their cells. This method keeps the soil surface stable during the germination period.
The technique promotes downward root growth as roots naturally grow toward the water source. This creates stronger, healthier root systems compared to shallow roots from top watering.
Bottom watering distributes moisture evenly throughout the growing medium. Top watering often creates dry pockets or channels where water runs through without saturating the soil.
The method also keeps seedling stems and leaves dry, which reduces the risk of fungal diseases. Wet foliage and stems are more susceptible to damping off and other moisture-related problems.
How frequently should seedlings be bottom watered to ensure optimal growth?
Watering frequency depends on seedling age and environmental conditions. Young seedlings before germination may need bottom watering every 1-2 days to maintain consistent moisture.
Once seedlings reach about one inch in height, they typically need more frequent watering. At this stage, checking daily and watering when the tray feels light maintains proper hydration.
Seedlings between 2-3 inches tall often require watering once or twice daily. As plants grow larger and develop more roots, they consume water faster and need more frequent attention.
Temperature, humidity, and light levels also affect watering needs. Warmer conditions and brighter light increase water consumption, requiring more frequent bottom watering sessions.