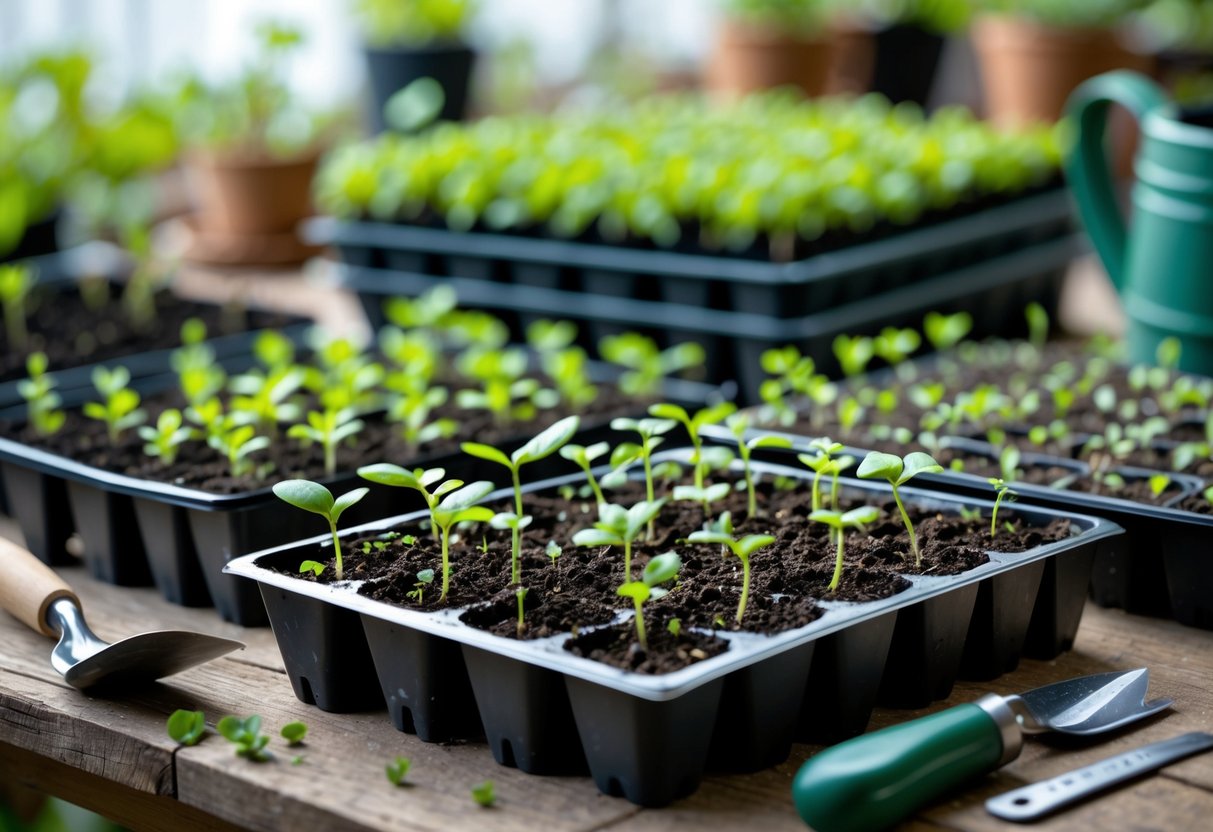
Starting seeds indoors gives gardeners a head start on the growing season, but success depends on having the right equipment. Seed starting trays are essential tools that create the ideal environment for seeds to germinate and young plants to develop strong roots before transplanting. With so many options available, from basic plastic cells to self-watering systems and biodegradable materials, choosing the right tray can feel overwhelming.
The best seed starting tray for any garden depends on the types of plants being grown, available space, budget, and whether the gardener prefers reusable or biodegradable options. Factors like cell depth, drainage, material durability, and special features such as humidity domes all play important roles in seedling success. Understanding these key elements helps gardeners make informed choices that match their specific needs.
This guide breaks down everything needed to select the right seed starting trays. It covers the different types available, essential features to consider, proper setup and maintenance, and tips for healthy seedling growth through transplanting.
Key Takeaways
- Seed starting trays come in plastic, biodegradable fiber, and peat materials with various cell sizes and special features like humidity domes and self-watering systems
- Proper drainage holes, appropriate cell depth for specific plants, and adequate spacing between cells are critical features for successful seed germination
- Choosing the right tray size, preparing it correctly with moistened growing medium, and maintaining consistent watering helps produce strong seedlings ready for transplanting
Understanding the Role of Seed Starting Trays
Seed starting trays serve as specialized tools that create controlled environments for young plants, offering distinct advantages over standard containers while directly influencing how seeds develop from germination through transplanting. These trays impact root health, moisture balance, and overall plant strength in ways that basic pots cannot replicate.
Benefits Over Pots and Other Containers
Seed trays provide specific advantages that make them better suited for propagation than regular pots or containers. Each cell in a seed tray creates an individual growing space that prevents root tangling between seedlings. This separation makes transplanting easier and reduces root damage.
The standardized cell sizes in seed trays help gardeners control soil volume and moisture more precisely. Unlike large pots where water can pool unevenly, seed tray cells distribute moisture consistently across all seedlings. This consistency leads to more uniform growth rates.
Seed starting trays also maximize space efficiency. A single standard 1020 tray can hold 32 to 128 cells depending on the insert used. This compact design allows gardeners to start more plants in the same area compared to using individual pots.
Key advantages include:
- Individual cells prevent root entanglement
- Uniform moisture distribution across all seedlings
- Space-efficient design for indoor growing areas
- Easier handling and transport of multiple seedlings
- Better air circulation around each plant
Impact on Seed Germination and Root Development
The design of seed trays directly affects how seeds germinate and develop roots. Most seed trays include drainage holes at the bottom of each cell, which prevents water from accumulating and causing seed rot. This drainage system maintains the ideal moisture level that seeds need without oversaturating the soil.
Cell depth influences root development patterns. Cells that are 2 to 3 inches deep give roots enough space to grow downward before transplanting. Shallow cells under 1 inch work for plants with small root systems but can restrict growth for larger seedlings.
The confined space of tray cells encourages roots to grow in a more organized pattern. Roots reach the cell walls and naturally air-prune themselves rather than circling endlessly as they might in oversized containers. This process creates healthier root systems that adapt better when moved outdoors.
Temperature control becomes easier with seed starting trays. The smaller soil volume in each cell warms up faster than large pots, which speeds up germination for heat-loving seeds.
Importance for Gardening Success
Using seed trays increases the success rate of starting plants from seed by addressing common gardening challenges. The controlled environment of a seed starting system reduces the variables that can cause seedling failure. Gardeners can monitor moisture, light, and temperature more effectively when working with uniform tray cells.
Seed trays support efficient transplanting schedules. When seedlings reach the right size, they can be moved to larger containers or outdoors without disturbing neighboring plants. This timing flexibility helps gardeners coordinate planting schedules with weather conditions.
The reusable nature of plastic seed trays makes them cost-effective for ongoing gardening projects. A quality tray can last multiple growing seasons with proper cleaning between uses. Biodegradable options serve gardeners who prefer single-use materials that break down in soil.
Starting seeds in trays builds stronger seedlings compared to direct outdoor sowing. Protected indoor conditions allow young plants to establish themselves before facing weather challenges, pests, and competition from weeds.
Key Features to Look For in Seed Starting Trays

The right seed starting tray combines proper drainage, appropriate cell sizing, and features that support healthy germination. Understanding these key features helps gardeners select trays that match their specific plants and growing conditions.
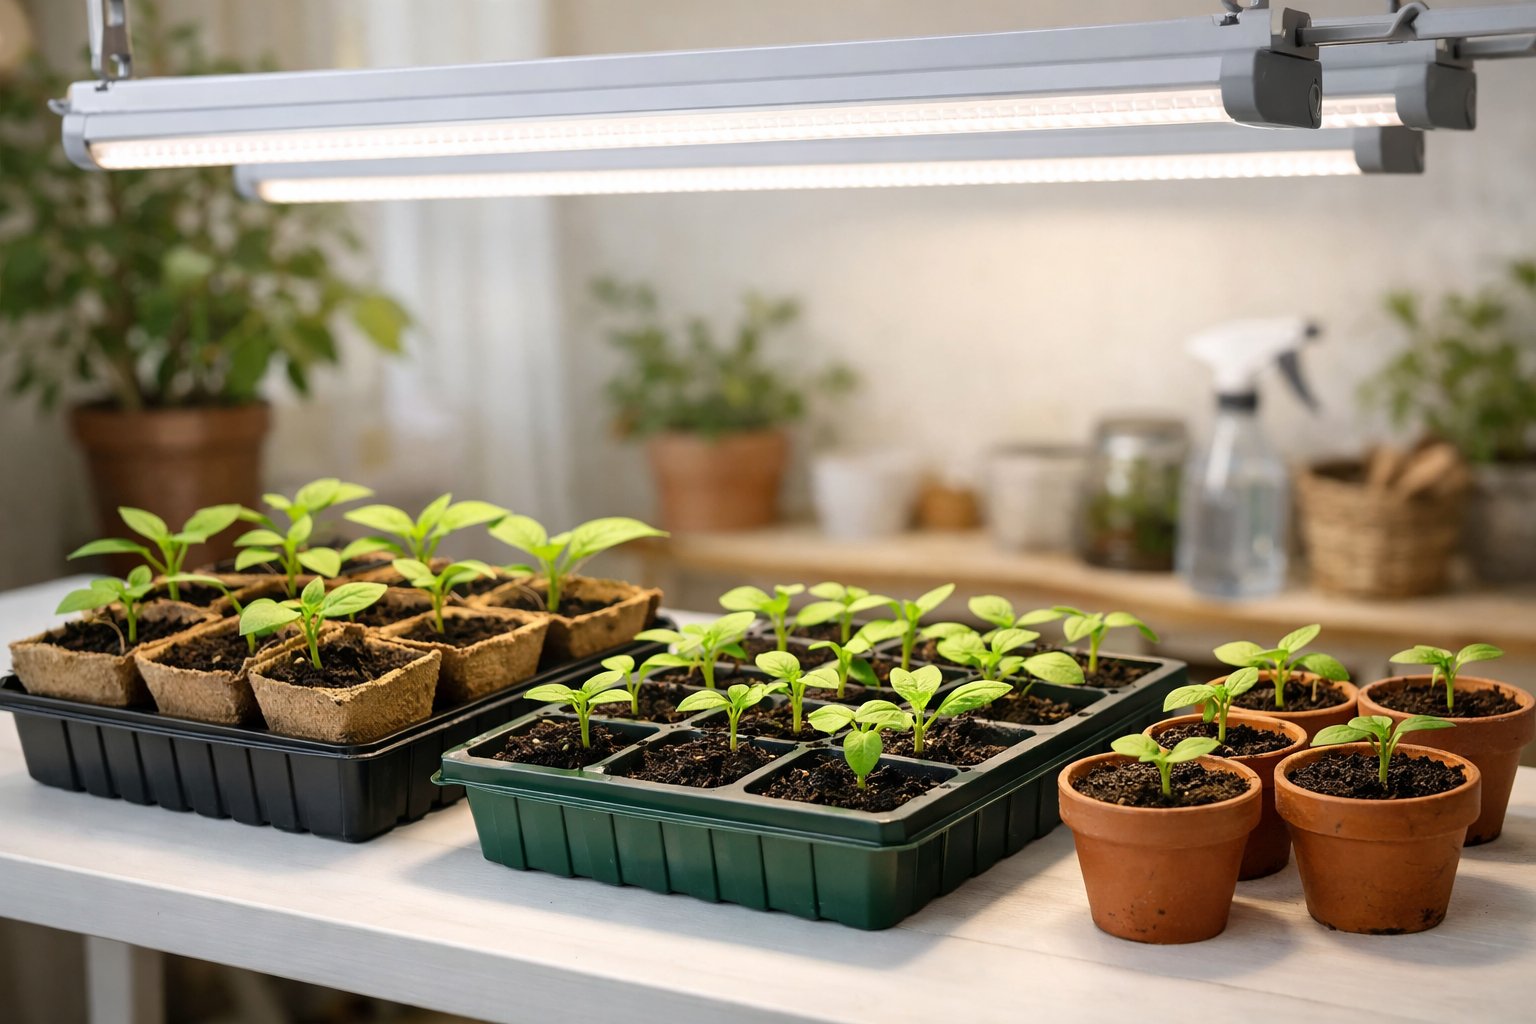
Tray Sizes and Cell Options
Seed starting trays range from compact six-pack designs to large 12 by 20 inch formats with dozens of cells. Cell depth varies from 1 inch to 3 inches, while width spans 1 to 3 inches square or round.
Large cells work best for plants with extensive root systems like tomatoes and peppers. These bigger compartments prevent root binding and reduce transplant shock. Smaller cells suit plants with shallow roots or those that will be transplanted quickly.
Multi-cell trays allow gardeners to start many seeds at once in one organized unit. Individual cell trays give each plant its own space, preventing root competition. The number of cells affects how many seeds can be started simultaneously and how much space the tray requires.
Standard tray sizes include 32-cell, 50-cell, and 72-cell configurations. Gardeners should match cell count to their garden size and available growing space.
Drainage Holes and Water Management
Drainage holes at the bottom of each cell prevent waterlogging and root rot. Without proper drainage, excess water accumulates and creates conditions for harmful mold and fungus growth.
A bottom water tray sits beneath the seed tray to catch draining water. This prevents mess and allows for bottom watering, where water placed in the lower tray gets pulled up through the soil. Some systems use a capillary mat between trays to regulate water distribution.
Self-watering designs feature two-part systems. The outer tray holds water while the inner tray with drainage holes sits above it. Seedlings draw moisture as needed through the mat or holes.
Side drainage holes on some trays provide additional water control. These holes work alongside bottom drainage to maintain optimal moisture levels without oversaturation.
Humidity Domes and Climate Control
A humidity dome covers the seed tray to create a warm, moist environment ideal for germination. These clear plastic covers function as a mini greenhouse, trapping heat and moisture around seeds.
Basic domes sit flat over standard trays. Tall domes accommodate seedlings up to 3 or 4 inches in height as they develop. Some domes include adjustable vents that regulate temperature and humidity levels inside the covered tray.
Vented domes let gardeners gradually acclimate seedlings to normal air conditions. Opening vents reduces humidity as plants mature and no longer need constant moisture. This feature proves particularly useful in colder climates or for extending the growing season indoors.
Products like the Growease Seed Starter Kit often bundle trays with fitted domes and water management features. Moisture retention under domes accelerates germination but requires monitoring to prevent fungal problems.
Ease of Handling and Transplanting
Flexible plastic bottoms on some trays allow gardeners to push seedlings out from below without damaging roots. This design feature simplifies transplanting and reduces handling stress on young plants.
Biodegradable fiber and peat trays can be cut apart and planted directly in the ground. The tray material breaks down naturally in soil, eliminating transplant disturbance entirely. Any portion of the tray above the soil line should be trimmed before planting.
Sturdy construction matters for reusable plastic trays. Thick, rigid plastic withstands multiple seasons of use and cleaning. Thin, flimsy trays crack or bend easily, making them difficult to move when filled with wet soil.
Tray weight affects portability when moving seedlings between locations. Lightweight designs work well for gardeners who need to shift trays under a grow light or rotate them for even sun exposure.
Types of Seed Starting Trays
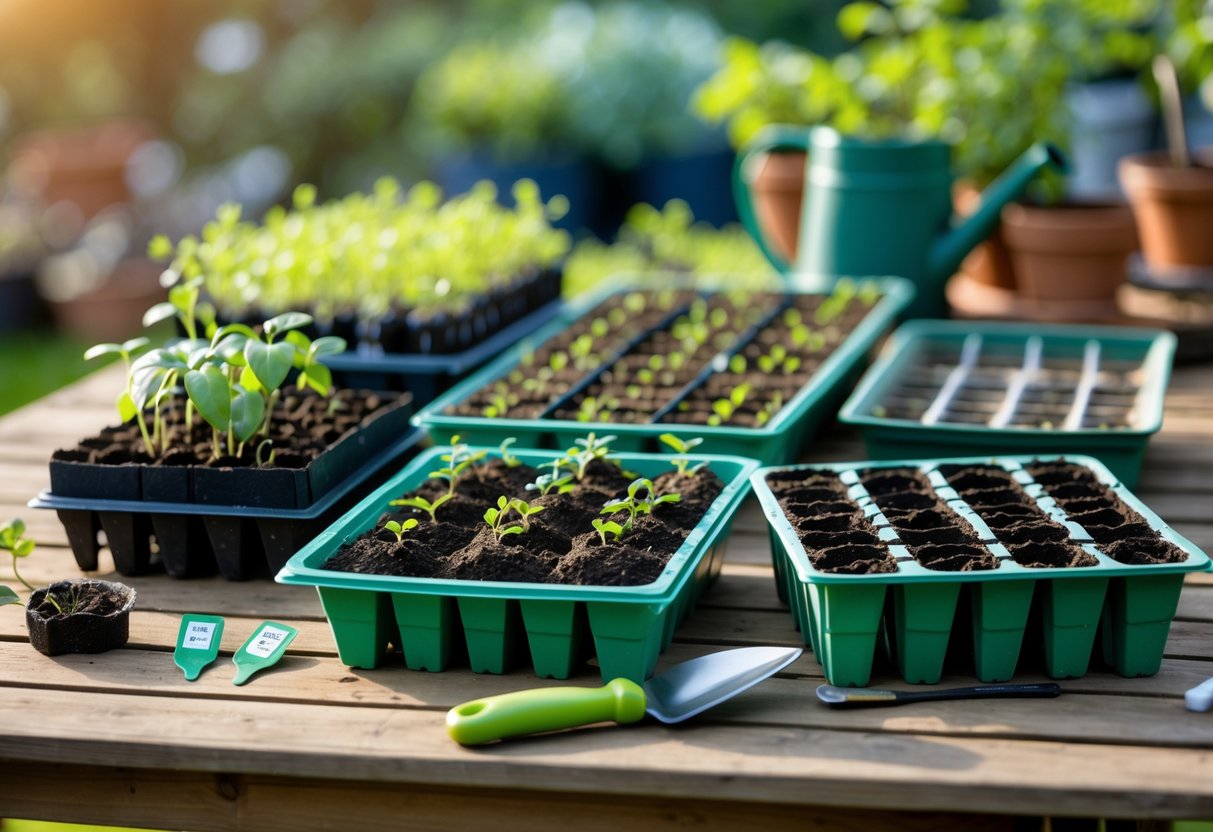
Seed starting trays come in different materials and configurations, each suited to specific gardening needs and preferences. The main options include reusable plastic trays, biodegradable alternatives, various tray formats based on cell count and arrangement, and creative DIY solutions.
Plastic Trays: Advantages and Disadvantages
Plastic seed starter trays are the most common option available to gardeners. These trays are durable and can be cleaned and reused for multiple growing seasons, making them cost-effective over time. Most plastic trays can last 5-10 years with proper care and storage.
Advantages of plastic trays:
- Reusable for many seasons
- Easy to clean and sterilize
- Available in many sizes and cell counts
- Generally inexpensive
- Compatible with humidity domes
Disadvantages of plastic trays:
- Not environmentally friendly
- Can crack in cold weather
- Require careful cleaning between uses to prevent disease
- Seedlings must be removed before planting
Plastic trays work well when paired with bottom watering systems. They hold moisture effectively and provide consistent growing conditions. However, gardeners must monitor drainage holes to prevent waterlogging, which can lead to damping off and root rot.
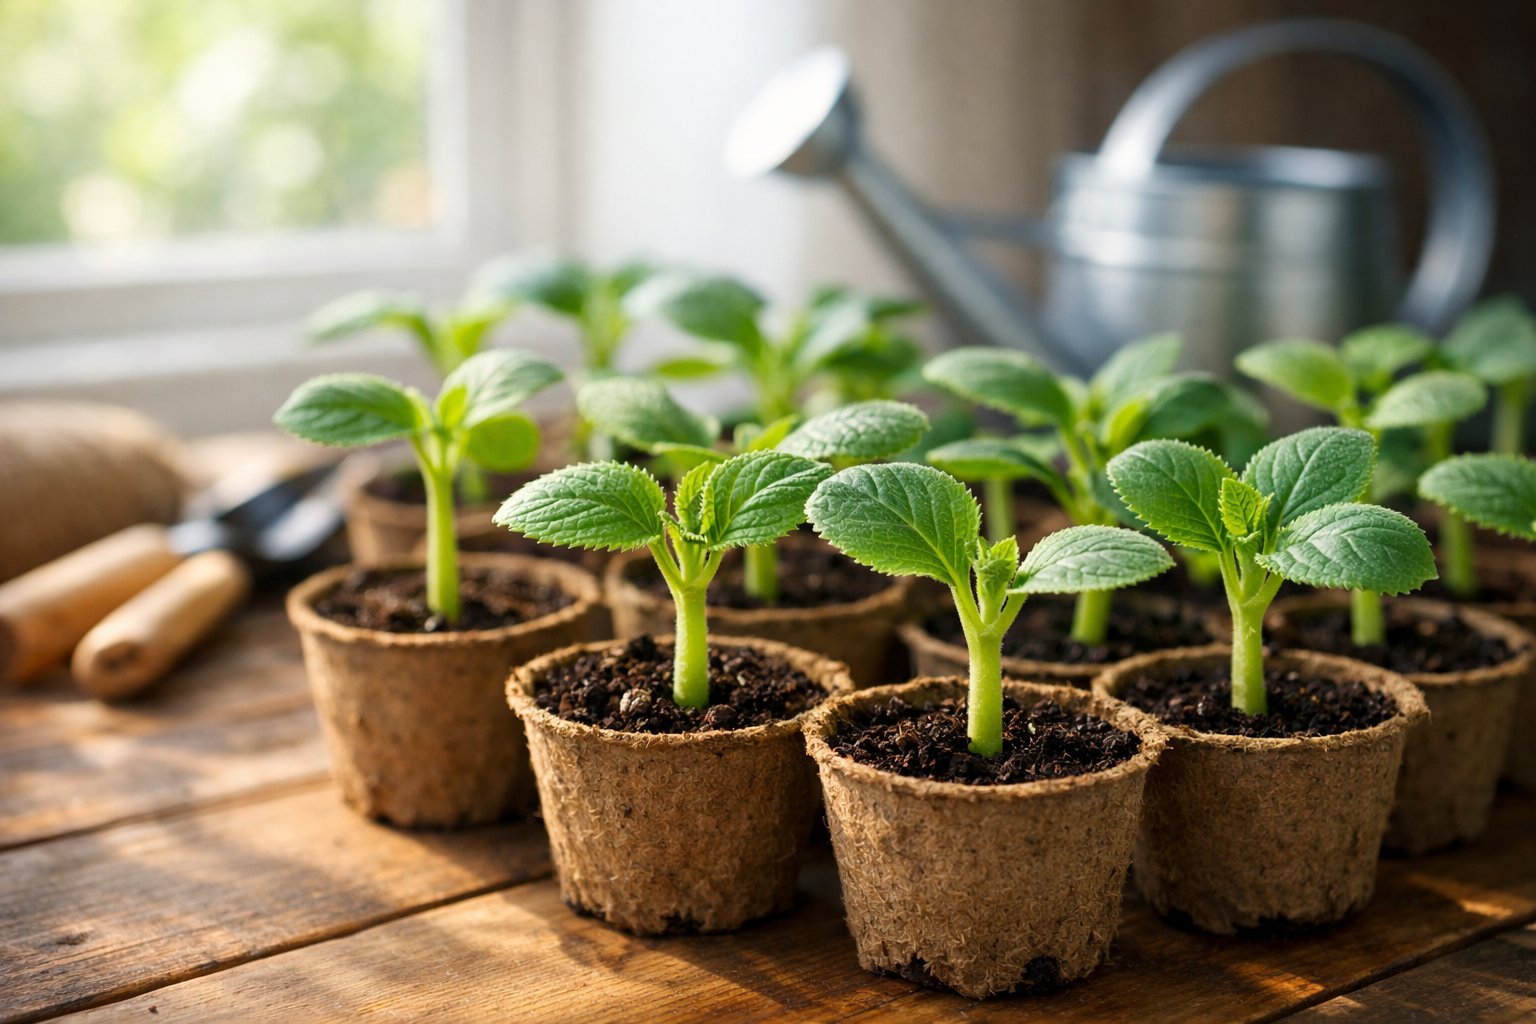
Biodegradable and Eco-Friendly Options
Biodegradable trays and pots can be planted directly into the garden along with the seedling. This reduces transplant shock and eliminates plastic waste. Common materials include coconut coir, peat pellets, newspaper pots, and cowpots made from composted cow manure.
Peat pellets expand when water is added and come in mesh netting that holds the growing medium together. Coconut coir pots offer a sustainable alternative to peat and break down quickly in soil. Cowpots and newspaper pots decompose within weeks after planting.
Key considerations:
- Must stay moist for proper decomposition
- Can develop mold if kept too wet
- More expensive per use than plastic
- Best for direct garden planting
These options work particularly well for plants that dislike root disturbance, such as cucumbers and squash. The biodegradable material allows roots to grow through the container walls without restriction.
Open Flats, Multi-Cell, and Channel Trays
Seed tray configurations vary based on how the growing space is divided. Open flats are single undivided trays that allow flexible spacing. Multi-cell trays have individual compartments ranging from 6 to 72 cells per tray. Channel trays feature long narrow sections ideal for growing microgreens or starting many small seeds.
Open flats work best for broadcasting seeds or using soil blocks. They require more attention to spacing but allow customization. Multi-cell trays keep seedlings organized and make transplanting easier since each plant has its own root zone.
Common cell counts and uses:
- 6-18 cells: Large transplants like tomatoes and peppers
- 32-50 cells: Medium-sized plants and flowers
- 72+ cells: Herbs, lettuce, and small seedlings
Channel trays measure about 1-2 inches wide and run the length of a standard 1020 tray. These work efficiently for crops that will be harvested young or transplanted quickly.
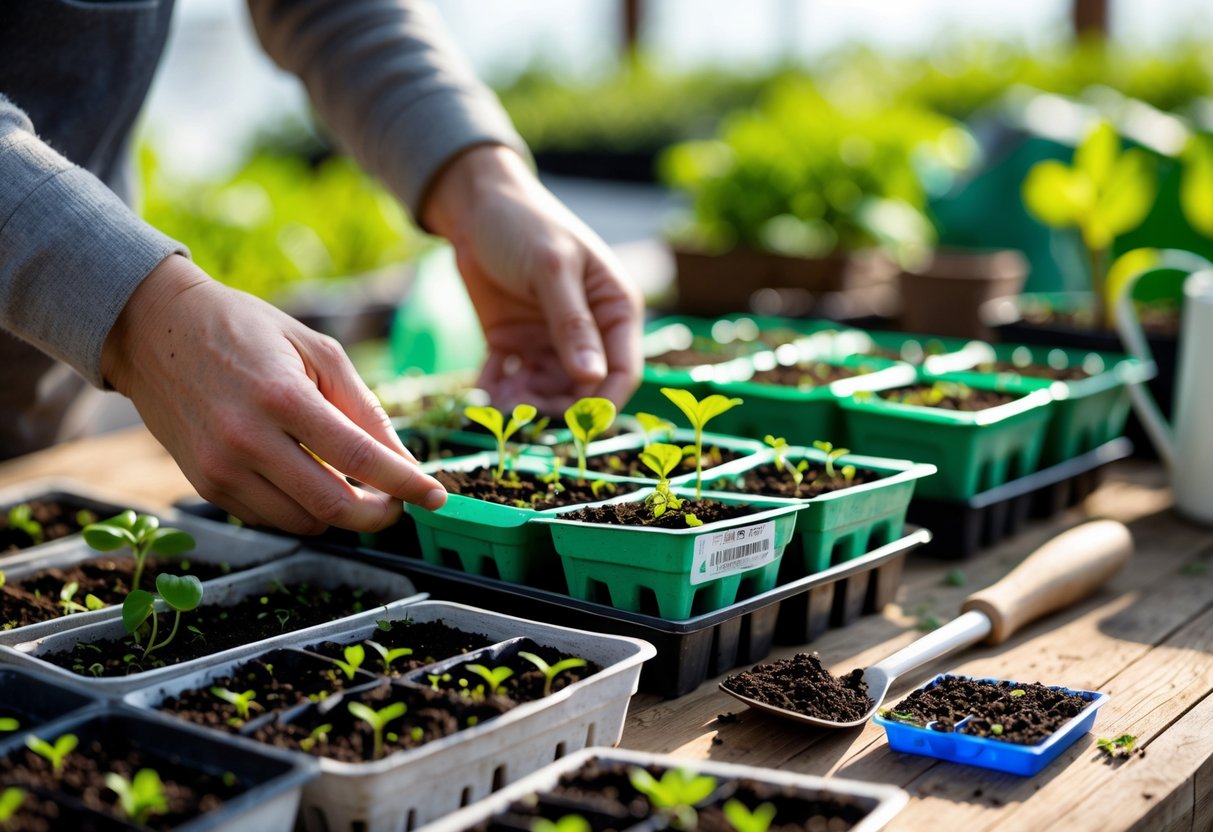
DIY and Alternative Tray Solutions
Many household items can serve as seed starter trays with minimal modification. Egg cartons, yogurt cups, toilet paper rolls, and plastic food containers all work when drainage holes are added. This approach reduces costs and repurposes materials that might otherwise be discarded.
Newspaper pots can be made using a simple wooden form or by hand-rolling strips around a cylinder. These decompose quickly and cost almost nothing to produce. Toilet paper rolls cut in half create individual cells that can be placed in a larger flat or tray for stability.
Effective DIY options:
- Egg cartons (paper-based only)
- Newspaper rolled into pots
- Cut toilet paper or paper towel rolls
- Plastic takeout containers with holes added
A basic seed starter kit can be assembled using a shallow plastic storage container as the base tray and paper products as individual cells. This setup works well for testing different seed varieties before investing in commercial trays.
Choosing the Right Tray Size and Cell Count
The size of your seed starting tray and the number of cells it contains directly affects how well your plants germinate and grow. Larger cells give roots more space to develop, while smaller cells let you start more seeds in less space.
Factors Affecting Cell Size Selection
Seed size determines the minimum cell size needed for successful germination. Large seeds like squash or cucumbers need cells at least 2 inches deep and wide to accommodate their root systems. Small seeds such as lettuce or herbs can germinate successfully in cells as small as 1 inch.
Plant growth rate matters just as much as seed size. Fast-growing plants like tomatoes develop extensive root systems within 4-6 weeks and perform better in larger cells. Slow-growing plants like peppers can start in smaller cells and be transplanted before they become root-bound.
The time seedlings spend in trays before transplanting affects cell size choice. Seedlings staying in trays for 6-8 weeks need deeper cells (2-3 inches) to prevent root crowding. Plants moving to the garden within 3-4 weeks can start in shallower 1-2 inch cells.
Common Tray Sizes: 32, 50, 72, 128 Cells
32-cell trays feature large individual cells (about 2-3 inches across) ideal for bigger vegetables and plants with extensive root systems. These trays work well for tomatoes, peppers, eggplants, and cannabis seedlings that need 6-8 weeks of development before transplanting.
50-cell trays and 72-cell trays offer medium-sized cells that balance space efficiency with adequate root room. These are the most versatile options for home gardeners. They suit most vegetable seedlings including broccoli, cabbage, and herbs that transplant within 4-6 weeks.
128-cell trays contain very small cells (about 1 inch across) designed for quick-starting seeds or plants that transplant early. These work best for lettuce, microgreens, and flowers that move to larger containers or the garden within 2-3 weeks. The small cell size increases germination rates per square foot but requires faster transplanting.
Matching Trays to Plant Types and Growth Needs
Vegetables with deep taproots (tomatoes, peppers, cucumbers) need 32-cell or 50-cell trays. The extra depth prevents root circling and transplant shock. These plants stay in trays for 6-8 weeks and develop strong stems during that time.
Leafy greens and herbs (lettuce, basil, cilantro) thrive in 72-cell or 128-cell trays. Their shallow root systems don't need much depth, and they transplant quickly. The higher cell count lets gardeners start more plants in the same footprint.
Flowers and ornamentals vary by species. Marigolds and zinnias do well in 72-cell trays, while larger flowers like sunflowers need 32-cell trays. Check the expected time to transplant—anything over 5 weeks needs larger cells to maintain healthy roots and consistent growth.
Seed Starting Tray Setup and Preparation
Proper tray setup involves sterilizing containers, filling them with the right growing medium, sowing seeds at correct depths, and maintaining ideal conditions for germination.
Cleaning and Sterilizing Trays
Clean trays prevent disease and fungal problems that can kill seedlings before they establish. New trays need a simple rinse with water to remove any manufacturing residue or dust.
Reused trays require more attention. Gardeners should scrub them with warm soapy water to remove old soil and plant debris. After washing, a sterilizing solution of one part bleach to nine parts water kills harmful bacteria and fungi that may linger on the surface.
The trays need to soak in this solution for 10 minutes. Rinse them thoroughly with clean water afterward to remove all bleach residue, which can harm young seedlings. Allow the trays to air dry completely before use.
Using Seed Starting Mix or Potting Soil
Seed starting mix provides the best results for germination. This soilless blend typically contains peat moss, vermiculite, and perlite. It stays light and sterile, which prevents damping off disease.
Regular potting soil is too dense for starting seeds indoors. The heavy texture can suffocate delicate seedlings and holds too much moisture. However, potting soil works once seedlings develop their first true leaves and need more nutrients.
Gardeners should moisten the seed starting mix before filling trays. Add water gradually and mix until the medium feels like a wrung-out sponge. Fill each cell to about a quarter inch below the rim. Press down gently to eliminate air pockets but avoid packing too tightly.
Sowing Seeds: Depth and Spacing
Seed depth affects germination rates significantly. Most seeds should be planted at a depth of two to three times their diameter. Tiny seeds like lettuce or petunias need only a light sprinkling of mix on top.
Large seeds such as beans or squash go deeper, around one inch into the medium. Read the seed packet for specific depth instructions, as requirements vary by plant type.
Place two to three seeds per cell to account for poor germination. This approach ensures at least one seedling per cell. If multiple seeds sprout, thin them by snipping off the weakest seedlings at soil level with scissors. Never pull out extra seedlings, as this disturbs the roots of the keeper plant.
Space is less critical in individual cells since each seedling has its own compartment. In open flats, scatter seeds at least one inch apart to reduce competition and make thinning easier.
Humidity and Temperature Management
Most seeds germinate best between 65 and 75 degrees Fahrenheit. A seedling heat mat placed under trays maintains consistent bottom heat, which speeds up germination by 5 to 10 days for warm-season crops.
Heat mats are especially useful for tomatoes, peppers, and eggplants. These plants prefer soil temperatures around 75 to 80 degrees. Without bottom heat, germination can take twice as long or fail entirely in cool rooms.
A clear plastic dome or plastic wrap over the tray traps moisture and creates a mini greenhouse effect. This high humidity environment prevents the soil surface from drying out before seeds sprout. Remove the cover as soon as seedlings emerge to provide air circulation.
Check moisture daily by touching the soil surface. Water from below by pouring water into the catch tray, or mist the surface gently with a spray bottle. The growing medium should stay consistently moist but never waterlogged.
Watering Methods and Maintenance Tips
Proper watering makes the difference between healthy seedlings and failed germination. Bottom watering prevents soil disturbance and reduces disease risk, while capillary mats offer consistent moisture delivery for hands-off growing.
Top Watering vs. Bottom Watering
Top watering involves pouring water directly onto the soil surface using a watering can or spray bottle. This method works well for established seedlings but can disturb seeds and compact soil. The main risk is uneven moisture distribution, where the top layer stays wet while roots below remain dry.
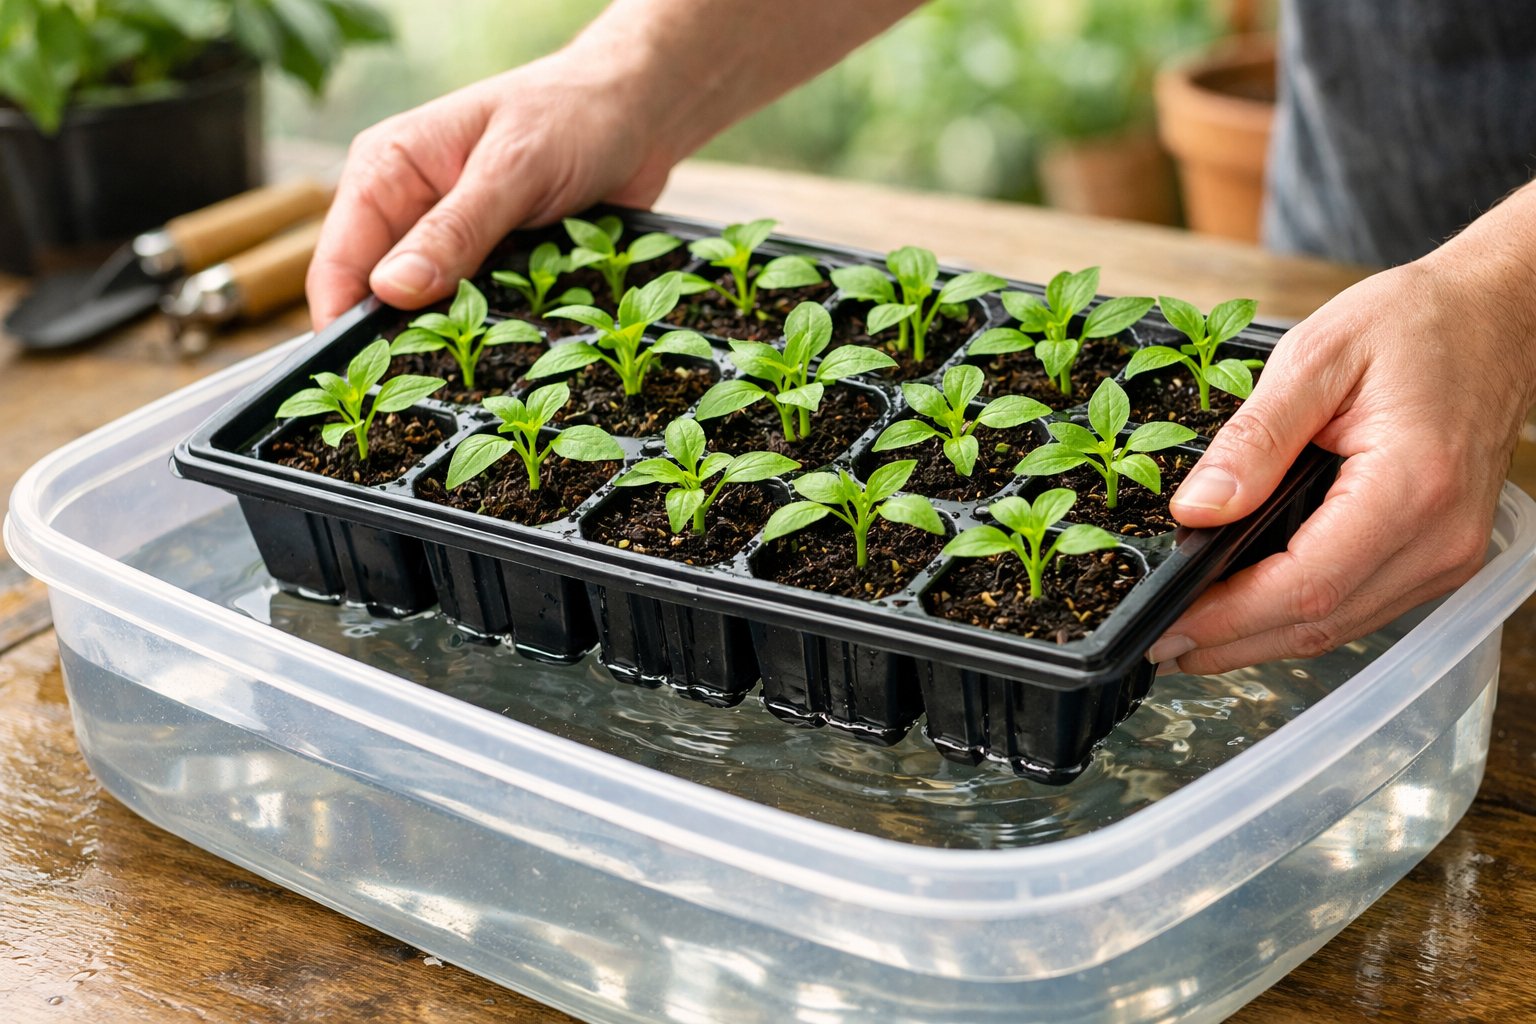
Bottom watering delivers water through drainage holes by placing trays in a shallow container of water. This method encourages roots to grow downward and prevents soil displacement. Most growers find bottom watering reduces damping off disease because it keeps foliage dry.
To bottom water, place the seed tray in a bottom water tray filled with 1-2 inches of water. Let the soil absorb moisture for 10-15 minutes until the surface feels damp. Remove the tray and let excess water drain completely.
Bottom watering works best for seed starting because it maintains even moisture without washing away seeds or exposing them through soil erosion.
Using Capillary Mats and Self-Watering Systems
A capillary mat sits beneath seed trays and wicks water upward through drainage holes. These felt-like materials provide steady moisture retention without daily watering. Place the mat in a waterproof tray, saturate it with water, then set seed trays on top.
Self-watering systems use built-in reservoirs that supply water as the soil dries. Some trays feature double bottoms where water sits below a perforated platform. Others use wicking strips that draw water from a separate chamber.
Both options reduce watering frequency and maintain consistent moisture levels. Capillary mats need refilling every 2-3 days depending on temperature and humidity. Self-watering trays may last 5-7 days between fills.
These systems work particularly well for gardeners who travel or struggle with consistent watering schedules. They also prevent the wet-dry cycles that stress young seedlings.
Monitoring Moisture and Avoiding Damping Off
Damping off is a fungal disease that kills seedlings at the soil line. It thrives in overly wet conditions with poor air circulation. The best prevention combines proper moisture management with good sanitation practices.
Check moisture levels daily by touching the soil surface. It should feel like a wrung-out sponge—moist but not soggy. Insert a finger one inch deep to test subsurface moisture. Water only when the top layer begins to dry.
Signs of correct moisture:
- Soil holds its shape when squeezed but doesn't drip
- Surface appears slightly darker when moist
- Trays feel heavy when lifted
Warning signs of problems:
- Green algae growth on soil surface (too wet)
- Seedlings wilting despite moist soil (root rot)
- White fuzzy growth at stem base (damping off)
Improve air circulation by running a small fan near trays on low speed. Avoid watering in the evening when cooler temperatures slow evaporation. Remove any seedlings showing damping off symptoms immediately to prevent spread.
Supporting Healthy Seedling Growth
Seedlings need the right light, warmth, and spacing to grow strong and sturdy. Without these conditions, young plants can become weak and struggle to survive transplanting.
Ensuring Adequate Light With Grow Lights
Seedlings need strong, consistent light to develop properly when starting seeds indoors. Natural window light often falls short, especially during winter months or in homes without south-facing windows. Most seedlings require 14 to 16 hours of light daily to grow thick stems and healthy leaves.
Grow lights solve this problem by providing reliable light regardless of outdoor conditions. LED grow lights are the most efficient option because they produce less heat and use less electricity than older fluorescent models. They also last longer and can be positioned closer to seedlings without burning them.
Position lights 2 to 4 inches above the seedlings and raise them as plants grow taller. This close distance mimics the intensity of natural sunlight. Using a timer helps maintain the 14 to 16 hour light schedule automatically. Without enough light, seedlings stretch toward any available light source and become weak.
Heat Mats and Temperature Control
Soil temperature affects how quickly seeds germinate and how well seedlings develop roots. Most vegetable and flower seeds germinate best when soil temperatures stay between 70°F and 80°F. Room temperature air often keeps soil much cooler than this ideal range.
Heat mats placed under seed trays warm the soil from below, speeding up germination by several days. They maintain consistent soil warmth even when room temperatures drop at night. Most heat mats raise soil temperature 10 to 20 degrees above room temperature.
Once seedlings emerge, many types prefer slightly cooler conditions around 65°F to 70°F during the day. Turning off heat mats after germination helps prevent overly rapid growth. Some gardeners use mats only at night or adjust them based on room temperature. Monitoring soil temperature with a simple thermometer helps gardeners make these adjustments.
Identifying and Preventing Leggy Seedlings
Leggy seedlings have thin, elongated stems that bend or flop over easily. This weak growth happens when plants don't get enough light or grow in temperatures that are too warm. Leggy plants struggle when moved outdoors because their stems can't support their own weight.
Preventing leggy growth requires adequate light from the start. Seedlings stretching toward a window or growing pale green instead of deep green need more light immediately. A small fan creating gentle air movement also strengthens stems by forcing them to develop thicker tissue.
Temperature plays a role too. Seedlings kept too warm, especially at night, grow quickly but develop weak stems. Cooler nighttime temperatures between 60°F and 65°F encourage stockier growth. If seedlings do become leggy, burying stems deeper during transplanting can help tomatoes and some other plants develop additional roots along the buried portion.
Transplanting Seedlings and Minimizing Shock
Successful transplanting depends on timing, careful handling, and choosing the right containers from the start. The type of seed starting tray affects how easily seedlings move to their next location and how quickly they recover.
When and How to Transplant
Seedlings are ready to transplant when they develop their first set of true leaves, which appear after the initial seed leaves. Most seedlings started in two-inch cells or small tray compartments need transplanting within 3-4 weeks.
Handle seedlings by their leaves, never by the stem. Gently loosen the growing medium around the roots before lifting. If roots have grown through drainage holes, carefully cut them rather than pulling the plant.
Water seedlings an hour before transplanting to reduce stress. Prepare the new container with moist growing medium and create a hole large enough for the root system. Place the seedling at the same depth it was growing, except for tomatoes which can be planted deeper.
Reducing Transplant Shock
Transplant shock occurs when seedlings experience sudden environmental changes or root disturbance. Stressed seedlings may wilt, stop growing, or drop leaves for several days after moving.
Key strategies to minimize shock include:
- Water thoroughly after transplanting to eliminate air pockets
- Keep newly transplanted seedlings out of direct sunlight for 2-3 days
- Maintain consistent moisture without overwatering
- Avoid fertilizing for at least one week after transplanting
- Handle roots as little as possible during the move
Temperature fluctuations increase stress. Keep transplants in a stable environment until they show new growth. Seedlings typically recover within 5-7 days if handled properly.
Role of Tray Type in Transplant Success
Individual cells in seed starting trays allow for gentle removal without damaging neighboring plants. Each seedling comes out with its root ball intact, which reduces root disturbance significantly.
Biodegradable pots and biodegradable trays eliminate transplant shock almost entirely. CowPots and similar products allow planting the entire container directly into soil. The container breaks down naturally while providing nutrients as it decomposes.
These biodegradable options work best for plants sensitive to root disturbance. They also save time when moving seedlings to the garden. The main drawback is faster moisture loss, which requires more frequent watering during the seedling stage.
Plastic trays with individual cells offer a middle ground. Flexible silicone or rubber trays make removal easier because the bottom of each cell can be pushed up. This method maintains root development while minimizing damage during the transplanting process.
Frequently Asked Questions
Gardeners often have specific questions about seed starting trays, from material selection to proper drainage and common mistakes. Understanding these practical details helps ensure successful seed germination and healthy seedling development.
What factors should be considered when selecting seed starting trays for various types of vegetables?
Different vegetables have different root structures and growth patterns. Large vegetables like tomatoes and peppers need deeper cells, usually 2-3 inches deep, to accommodate their extensive root systems. Smaller vegetables like lettuce and herbs can thrive in shallow cells of 1-1.5 inches deep.
Cell size matters just as much as depth. Root vegetables and plants that don't transplant well need individual cells that are at least 2 inches wide. Plants that grow quickly, like squash or cucumbers, benefit from larger cells to prevent becoming root-bound before transplanting.
The number of cells per tray affects efficiency and organization. A standard tray with 72 cells works well for small seeds and high-volume planting. Trays with 32 or 50 cells provide more space for medium-sized vegetables.
What are the benefits of using reusable seed starting trays versus disposable ones?
Reusable trays made from durable plastic last multiple growing seasons with proper care. They reduce waste and save money over time since gardeners don't need to purchase new trays each year. Most reusable trays can withstand cleaning and sterilization between uses.
Disposable trays, particularly biodegradable options, eliminate transplant shock since seedlings go directly into the ground with the container. They break down naturally in the soil, adding organic matter. However, they cost more per season and require fresh purchases annually.
Reusable trays require storage space during the off-season and must be sterilized to prevent disease transmission. Disposable trays skip these maintenance steps but generate more waste if they're made from non-biodegradable materials.
How does the presence of drainage holes impact the effectiveness of seed starting trays?
Drainage holes prevent water from pooling at the bottom of cells, which causes root rot and fungal diseases. Excess water needs an escape route, or it will suffocate developing roots and create an environment for harmful pathogens.
Trays without drainage holes require careful watering to avoid oversaturation. Gardeners must monitor moisture levels constantly and risk drowning seeds or creating stagnant conditions. This makes successful germination much harder to achieve.
Proper drainage holes should be located at the bottom of each cell, not just the tray. Multiple small holes work better than one large hole because they allow water to escape while keeping soil in place. The holes should be at least 1/8 inch in diameter for adequate drainage.
Which materials are preferable for heavy-duty seed starting trays and why?
Heavy-duty polystyrene plastic provides excellent durability and can handle repeated use over many seasons. This material resists cracking and warping from temperature changes and moisture. It's rigid enough to support the weight of wet soil and seedlings without bending.
Professional-grade polypropylene offers similar strength with added flexibility. This material bounces back from minor impacts and doesn't become brittle in cold temperatures. It maintains its shape even when filled with heavy, saturated growing medium.
Thick-walled construction matters more than material type alone. Trays with walls at least 2mm thick resist damage during handling and cleaning. Reinforced edges and corners add structural integrity where stress typically occurs.
How do you properly utilize seed trays with lids for optimal plant growth?
Seed tray lids create a humid microclimate that speeds up germination by trapping moisture and warmth. The lid should stay on until seeds sprout and the first leaves appear. This typically takes 5-14 days depending on the plant species.
Remove the lid once seedlings emerge to prevent fungal problems and leggy growth. Trapped humidity after germination encourages damping-off disease and weak stems. Seedlings need air circulation to develop strong, sturdy growth.
Vented lids offer better control than solid ones by allowing some air exchange while maintaining humidity. Adjust the vents gradually to acclimate seedlings to lower humidity levels. Check under the lid daily for signs of germination or excess condensation.
What are the common pitfalls to avoid when starting seeds in trays?
Overcrowding seeds in cells leads to competition for light, water, and nutrients. Plant only 1-2 seeds per cell for most vegetables. Remove the weaker seedling if both germinate to give the stronger one room to develop.
Using garden soil instead of seed starting mix causes drainage problems and introduces weed seeds and pathogens. Seed starting mix is sterile, lightweight, and formulated for proper moisture retention. It gives seeds the best chance at healthy germination.
Placing trays in locations without adequate light results in tall, weak seedlings that stretch toward any available light source. Seedlings need 12-16 hours of bright light daily. A south-facing window or grow lights positioned 2-3 inches above the seedlings provides sufficient illumination.